Tufting
How a Tufted Rug Is Made: The Studio Process, Step by Step
What stages does a tufted rug pass through, from design to shearing? A step-by-step account of stretching, drafting, yarn, backing and finishing from the studio.
Updated:
Most content explaining how a tufted rug is made was written to sell a tufting gun. This is not that. What follows is the path a piece actually takes in the studio: how long each stage takes, what breaks if you rush it, and why this work is slower than it looks.
There are seven steps. None of them can be skipped.
1. Design and drafting#
Everything begins with a drawing. The idea might come from a photograph, a colour palette or just a feeling, but before the gun is touched the simplified version of the design has to exist on paper.
Simplification is the critical part here. On a tufted surface the smallest unit is the thickness of the yarn; it will not carry the fine detail paint carries. So the design stage is really a "what do we remove" stage. A good tufting design is what remains once everything removable has been removed.
Dimensions are settled here too, because the frame is built to them.
2. Stretching the cloth#
The backing cloth is stretched onto a wooden frame. This step looks dull but decides the fate of the piece.
Tension has to be equal at every point. If one corner sits looser than another, the gun leaves yarn at a different depth in that area, the surface ripples, and that ripple never comes out later. Frame setup is therefore never rushed; once stretched, the cloth is checked by hand across its whole area.
Setup takes almost the same time for a small piece as a large one. That is one reason a base price applies at small sizes.
3. Transferring the design#
The drawing moves onto the cloth. The lines have to be clear, because while tufting you cannot see the face of the work, you are looking at the reverse of the cloth as you go.
This is the most disorienting thing about tufting: the design is worked in mirror. Any lettering or asymmetric form has to be reversed when transferred. A mistake at this stage is only discovered after the piece comes off the frame, and at that point there is no going back.
4. Tufting the yarn#
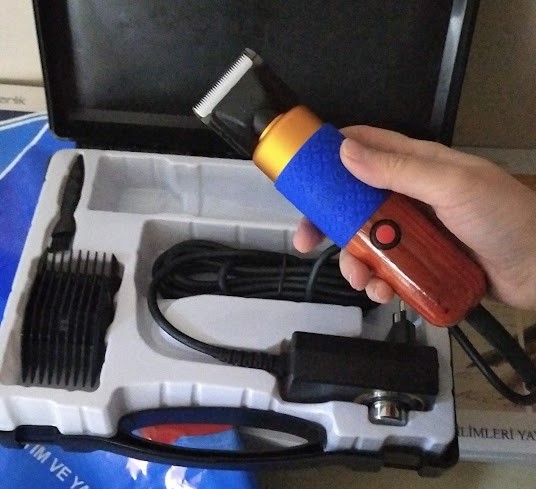
This is the production itself. The gun is pressed to the cloth, the trigger pulled, and yarn is pushed through the backing to leave a loop on the other side.
Several things are controlled at once:
- Speed. Too fast and the loops sit sparse; too slow and the cloth tears
- Pressure. The gun must meet the cloth with consistent force or the pile height varies
- Colour order. Generally you work from broad areas towards detail
- Direction. Changing direction within one area leaves a visible mark on the surface
Filling one square metre takes between one and three days depending on density. On highly detailed work the number of colour changes rises and the time grows noticeably, that is what the detail multiplier in the price actually represents.
5. Backing and fixing#
When tufting is finished the loops are not attached to anything. Pull one and it comes out. So an adhesive is applied to the reverse, then a backing cloth is laid over it.
Waiting is mandatory here. Coming off the frame before the adhesive has fully cured lets the loops shift. Curing can take a day depending on the thickness of the piece and the humidity.
Floor pieces get thicker backing and stronger fixing, a surface that will be walked on cannot have the same construction as a panel that hangs. That is precisely the technical reason floor rugs and wall panels carry different rates.
6. Shearing and finishing touches#
The surface that comes off the frame is still untidy. Pile heights are uneven and the edges are ragged.
Shearing is the work of levelling it gradually. You never cut much at once; you cut a little, look, cut a little more, because yarn you remove does not come back. It is the step that demands the most patience and shapes the final appearance more than any other.
Colour boundaries are cleaned at the same stage. Stray strands sitting between two colours are taken out with scissors and the forms sharpen.
7. Edge finishing#
The last step closes the edges. Wall panels get a concealed hanging system on the reverse; floor rugs get edge stitching and, optionally, a non-slip backing.
If a fringed edge was requested, it is added here. That is purely an aesthetic choice and has nothing to do with durability.
How long it takes in total#
An average commission is delivered 21 days after the deposit. Roughly, it breaks down like this:
- Design and frame setup: 1-2 days
- Tufting: 1-4 days depending on size and detail
- Backing and curing: 1-2 days
- Shearing and finishing: 1-2 days
- The remainder: buffer, checking and packing
Why does the range vary so much? Because one person makes these, and more than one piece can be on frames at once. You can start another piece while one is curing, but you cannot tuft two at the same time.
Why it costs more than a machine-made rug#
That is the first question any comparison raises. The answer is in the steps above: in machine weaving, size does not raise cost linearly; by hand it does. Every square centimetre is worked individually.
In return, a handmade surface allows free colour transitions, loop direction and pile height. A machine cannot do that.
On maintenance the difference is negligible; caring for a tufted rug comes down to regular dusting and keeping it away from damp.
Starting this process for your own piece#
If you want your own design or photograph to go through these steps, you can choose size and technique on the custom order page and send your image. We gathered the ordering side (price, deposit, delivery) in the complete guide.
To see how finished pieces look, have a look through the gallery.
Frequently Asked Questions
How many days does a tufted rug take?
An average commission is delivered 21 days after the deposit. The tufting itself takes between one and four days depending on size and detail; the rest goes to design, frame setup, curing, shearing and finishing.
Why is the design worked in mirror?
While tufting you are looking at the reverse of the backing cloth; the loops form on the other side. So lettering and asymmetric forms are transferred mirrored. A mistake here is only found once the piece comes off the frame.
Do the loops in a tufted rug come out?
On an unbacked surface, yes. That is why adhesive is applied to the reverse after tufting and a backing cloth is laid over it. Coming off the frame before it cures lets the loops shift, so waiting at this stage is mandatory.
What is the difference between making a floor rug and a wall panel?
A floor rug will be walked on, so it needs tighter loops, thicker backing and stronger fixing. A wall panel faces no abrasion and does not need that construction; the effort there goes into the visual quality of the surface.
Why is shearing done gradually?
Yarn you remove does not come back. So you cut a little, look, and cut a little more. Shearing shapes the final appearance more than any other step and demands the most patience.